How to Set up Parcel Email with Gmail
Important Notice Parcel Email is no longer being developed, it is now in the maintenance mode. It is no longer available for new customers. It is not advertised on the premium purchase page and support is not provided for it. It works "as is". We recommend using the share extension instead to add deliveries from email clients.
How to Set up Parcel Email with Gmail
- Make sure that you have enabled push notifications in the app settings. Gmail might send you a verification code to confirm forwarding, it will be relayed to you via a push notification from Parcel.
- Sign in to your Gmail account.
- Open your account settings:
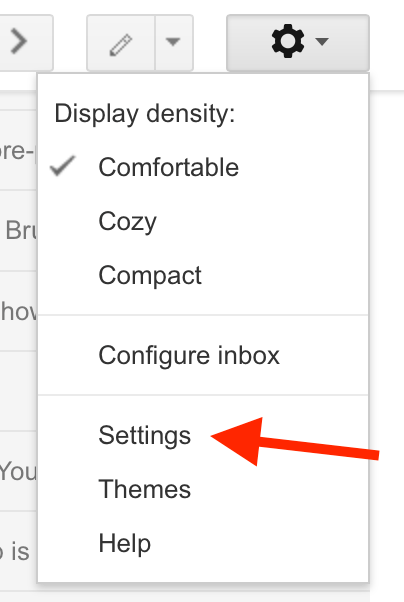
- Select “Forwarding and POP / IMAP” tab.
- Add your Parcel Email address as a forwarding address. If you don't know it, please visit web.parcelapp.net to set it up.
- A confirmation code will be sent to your Parcel Email address. Parcel will receive the code on your behalf and send it to you via a push notification.
- Enter the confirmation code in Gmail settings.
- Make sure that 'Disable forwarding' option is selected.
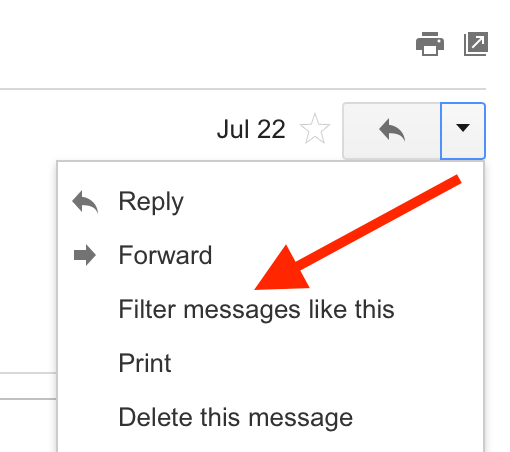
- Find a delivery email from a merchant in Gmail. It has to be an email that you frequently receive and it has to have a clearly identifiable tracking number and a carrier name. Do not set up this for Amazon, use Amazon integration instead.
- Select ‘Filter messages like this’ from the options:
- Specify additional filter parameters if necessary to make sure that only relevant emails are forwarded.
- Click on 'Create filter with this search'.
- Enable 'Forward it to' and select Parcel Email from the relevant list.
- Click on 'Create filter'.
Support Articles Click here to read other support articles related to Parcel.
Contact Us Please feel free to contact us in case if you have any questions.